The Google Drive integration in Responsly helps you automatically save files from your file upload forms to a selected folder in Google Drive. It is the easiest way to centralize documents, keep submissions organized, and make uploaded files instantly available to your team.
In this guide, you will learn how to connect Google Drive, authorize access, select a destination folder, and manage or revoke the integration when needed.
What you need
- A Responsly account with access to the form/survey editor
- A Google account
Note: The Google Drive question supports all file types, with a maximum file size of 10 MB.
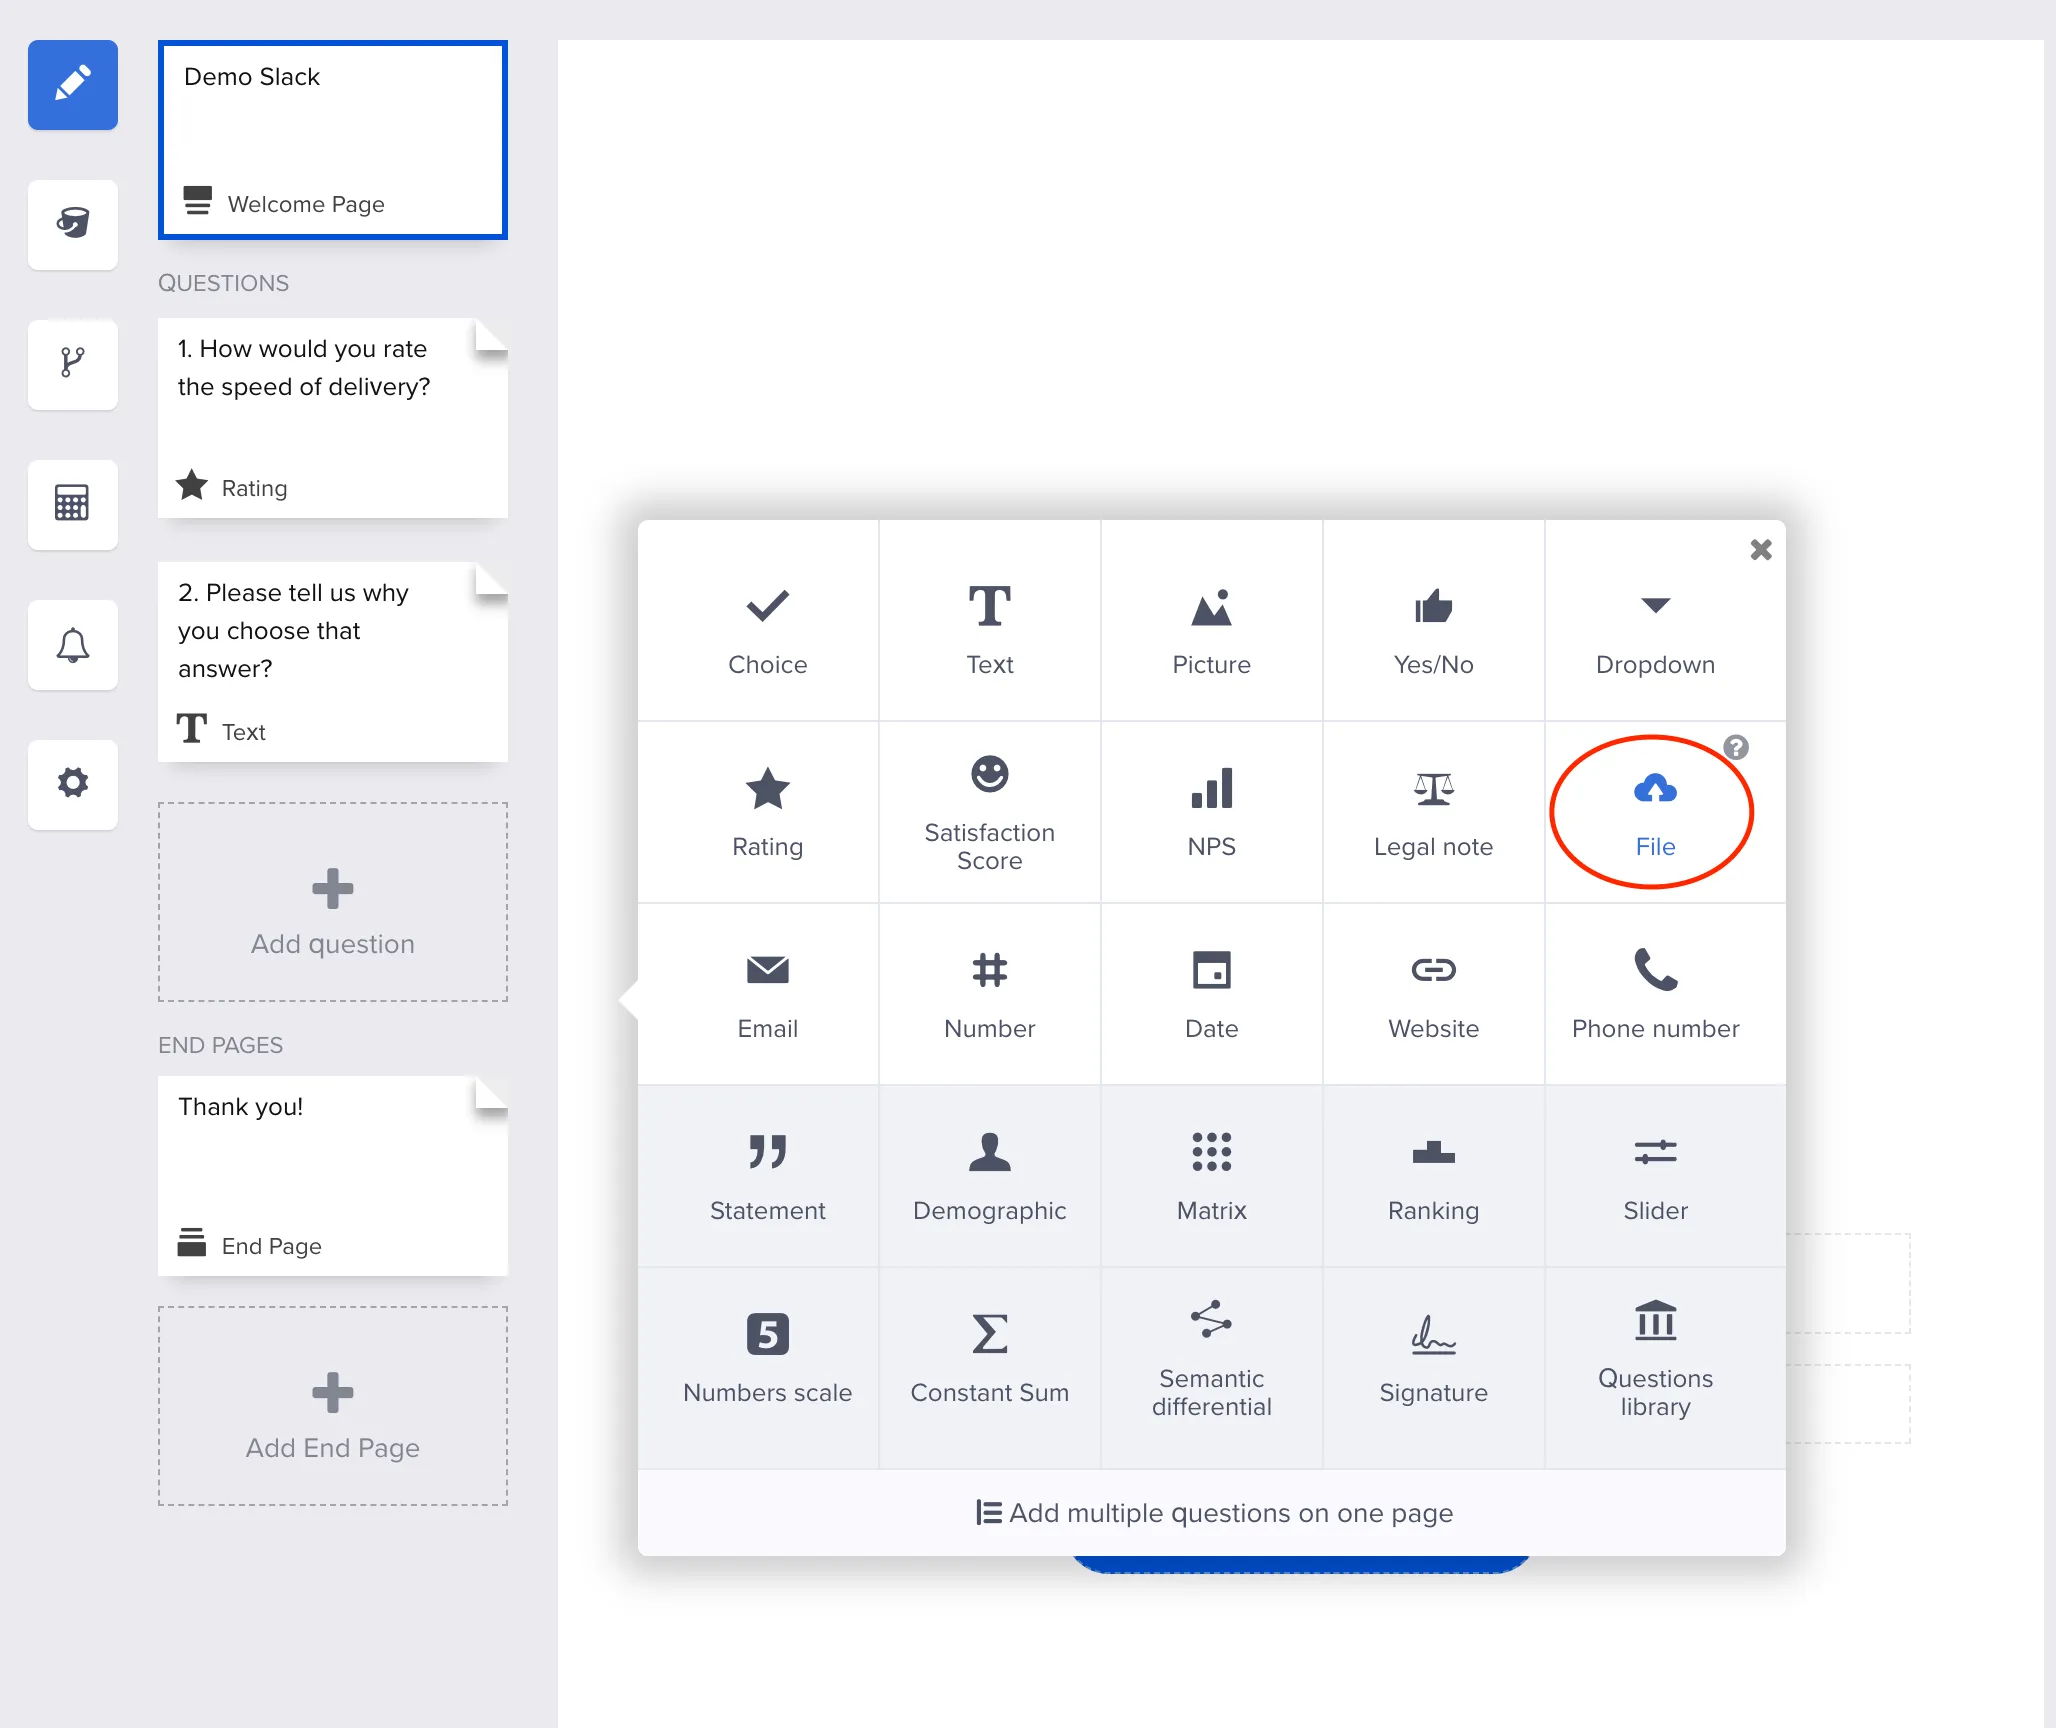
How to add a Google Drive question
- In your form, click Add question and add a File question.
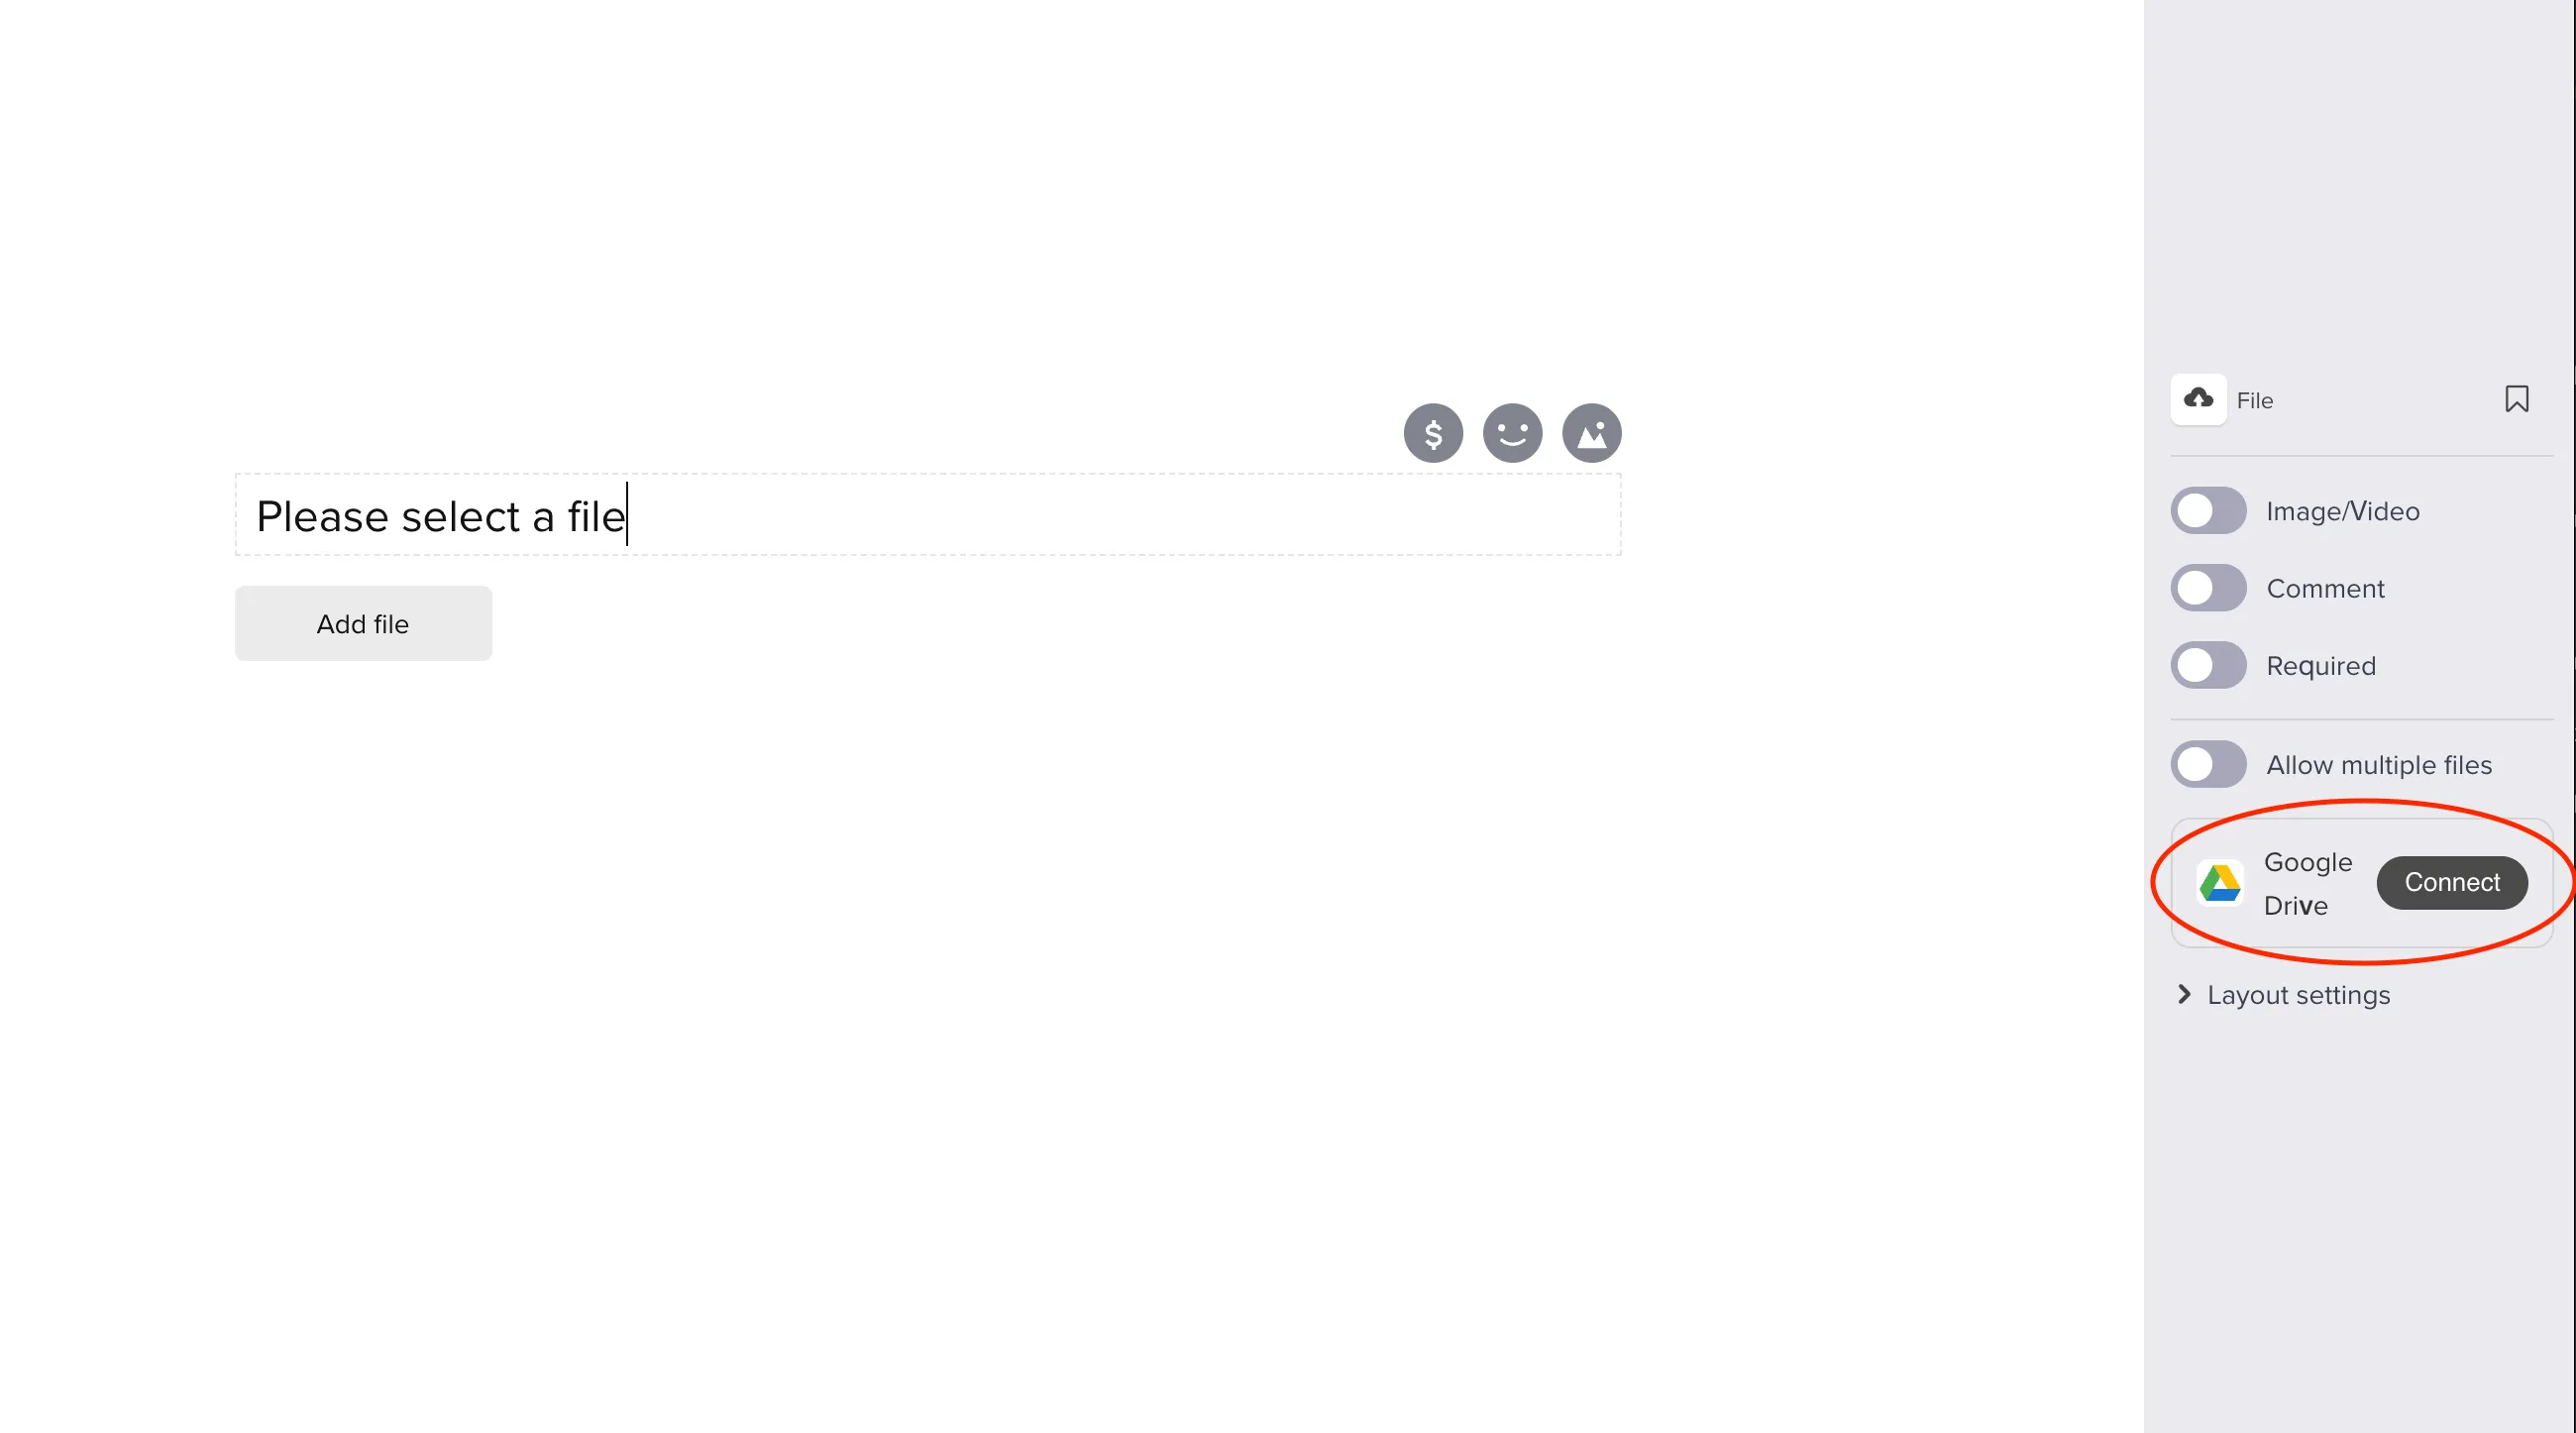
- In the right-side panel, find the Google Drive block and click Connect.
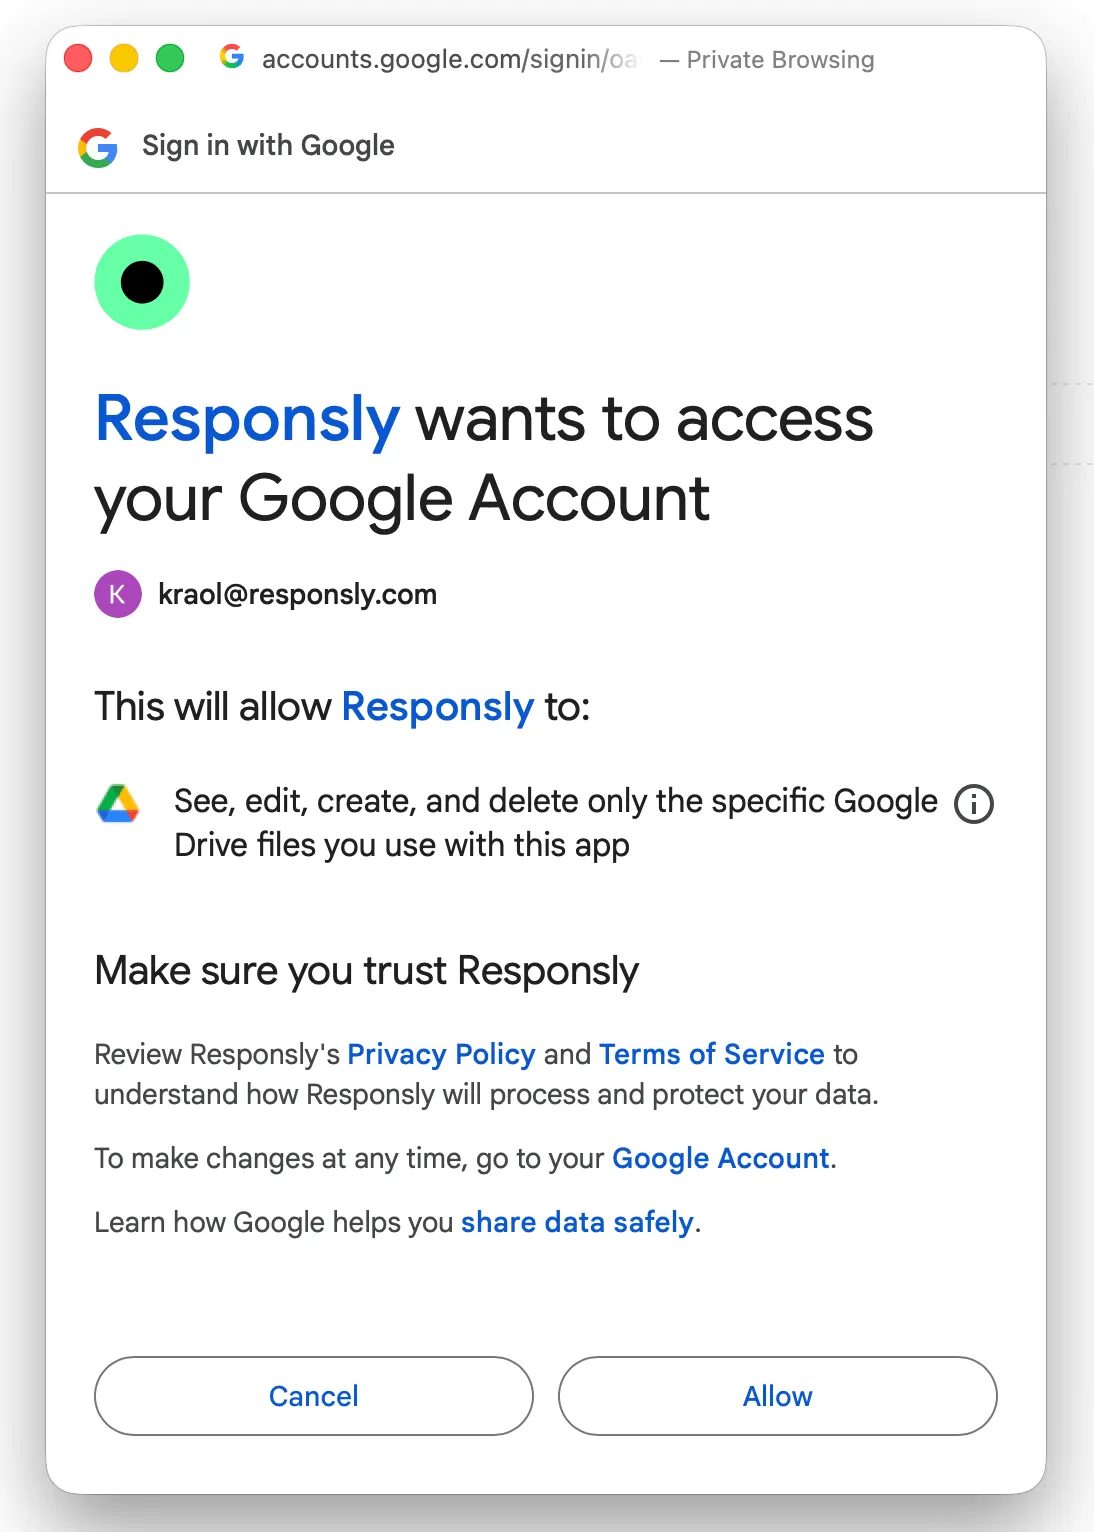
- Click Authenticate to let Responsly connect to your Google Drive account.
If the Google sign-in window does not open, your browser is blocking pop-ups. Click the blocked pop-up icon in the address bar, allow pop-ups for Responsly, and try again.
- In Google OAuth:
- select the Google account you want to use,
- click Allow to grant required permissions.
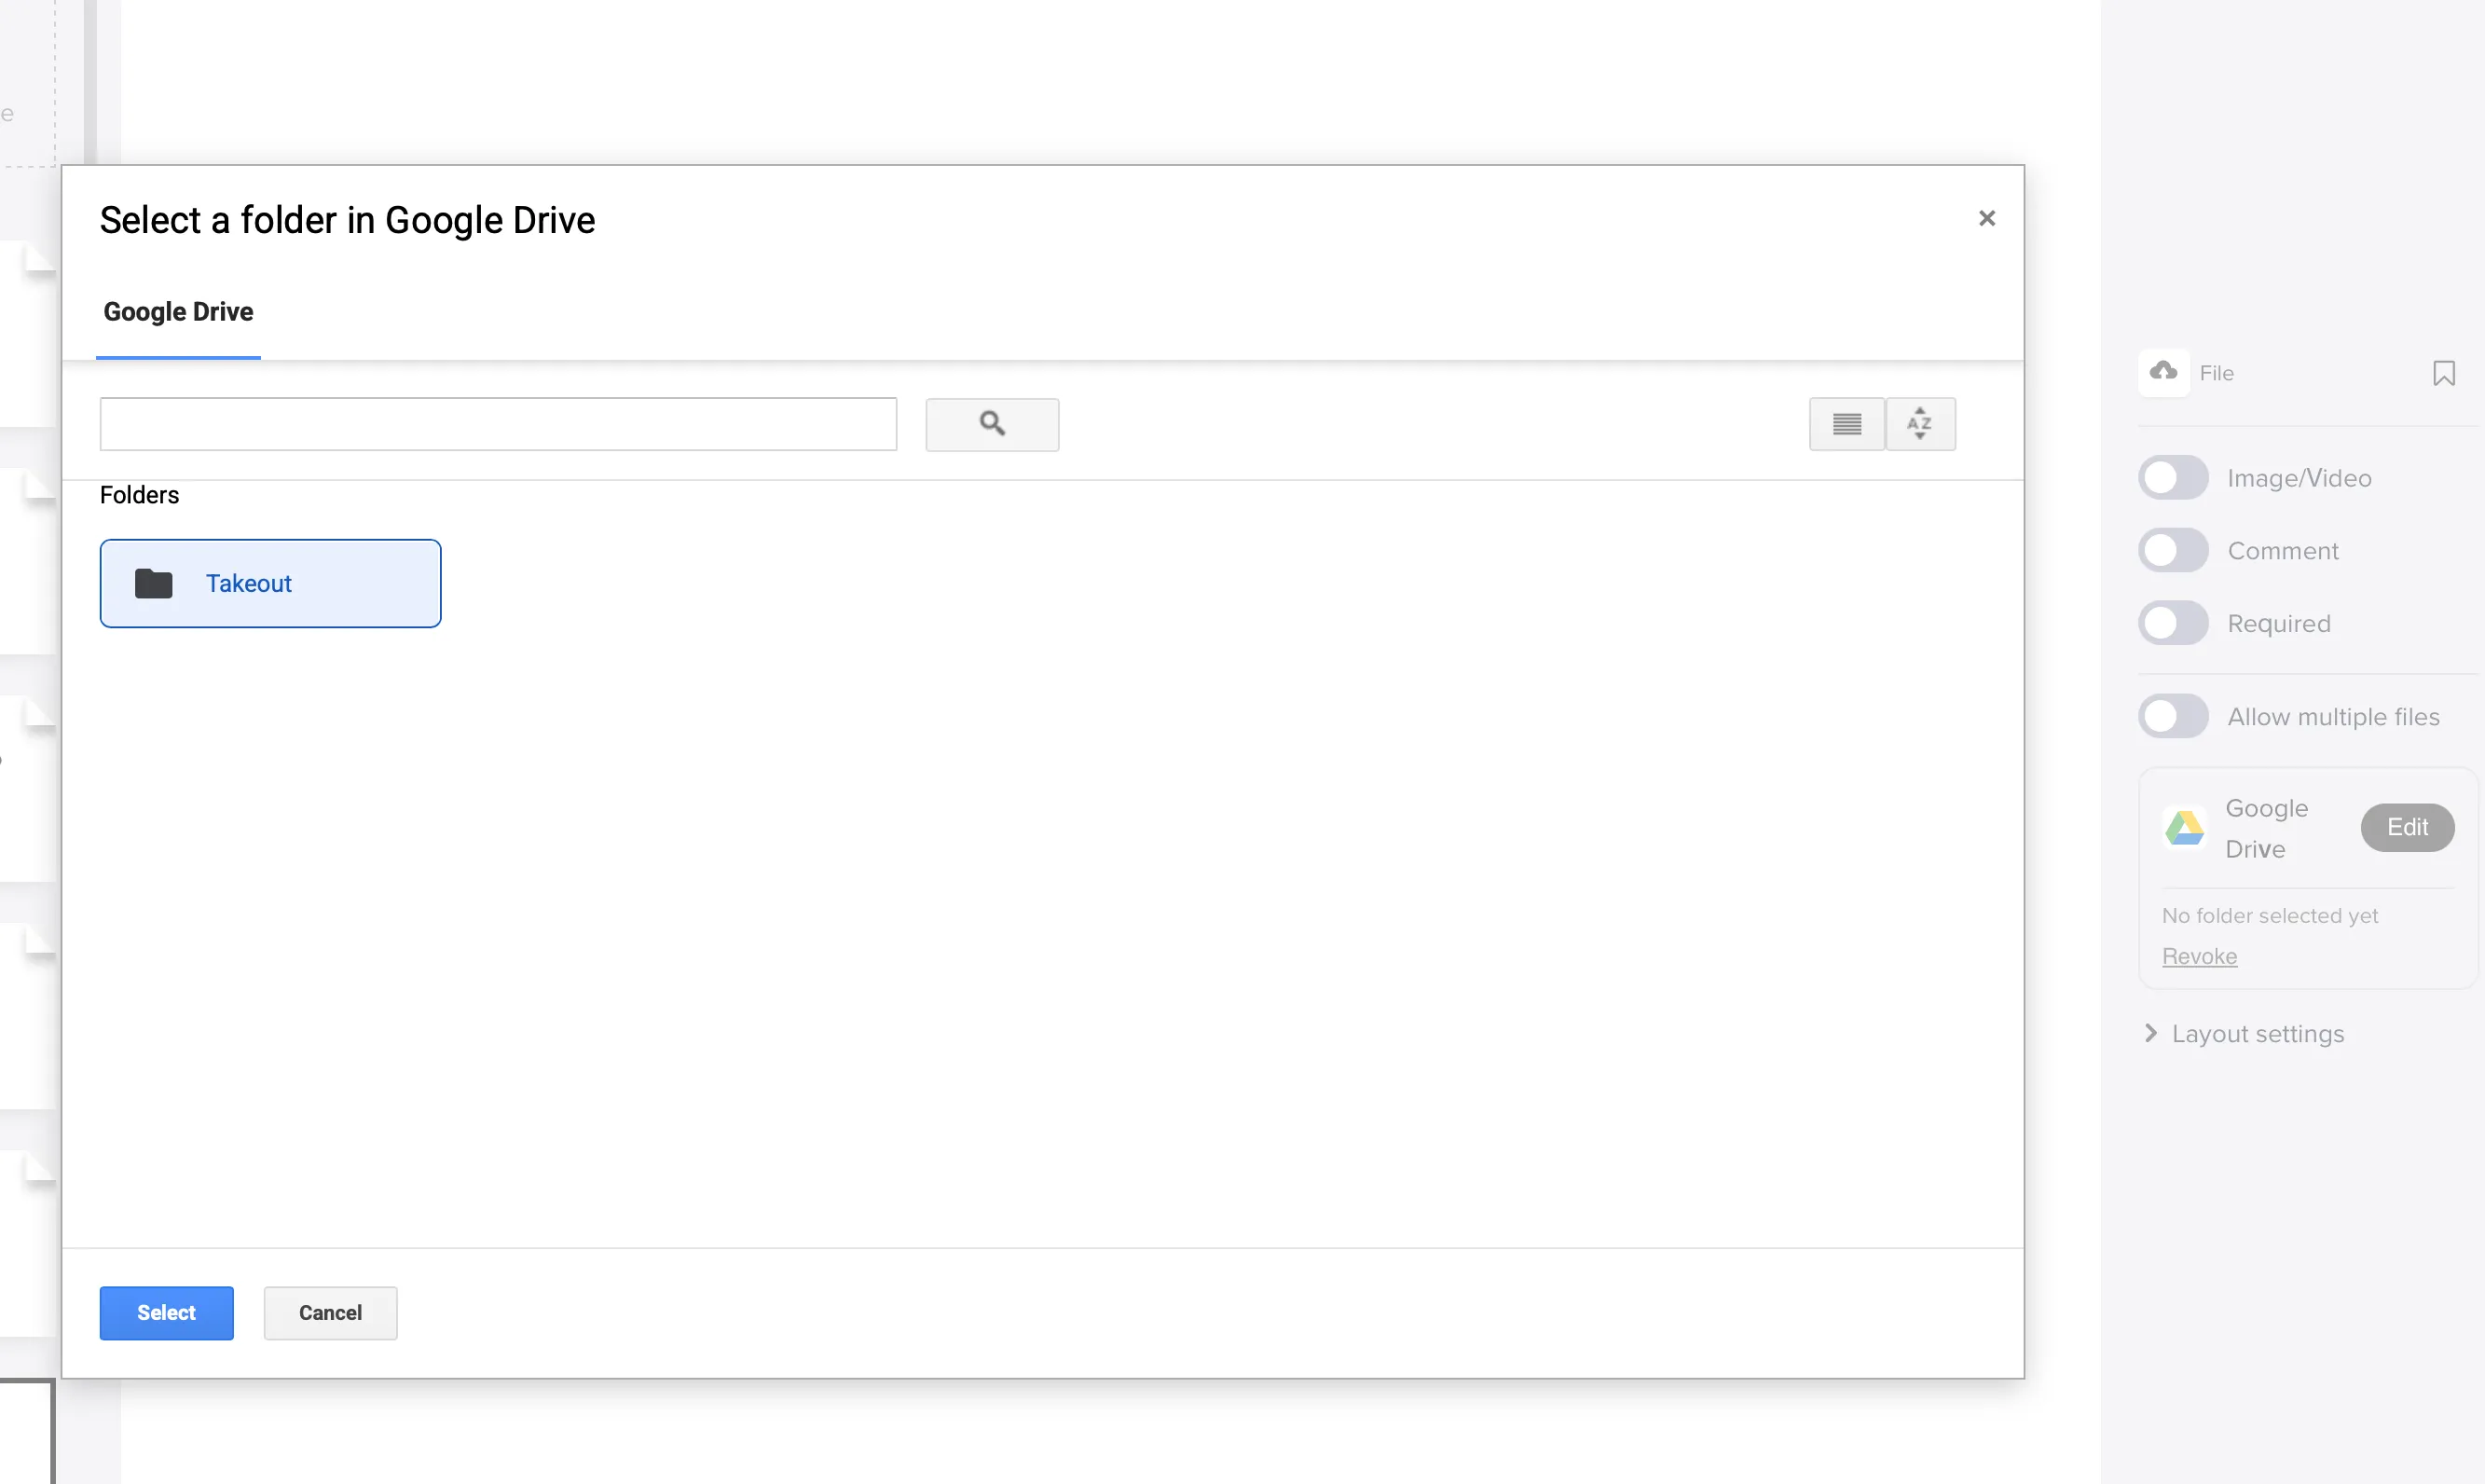
- Click Set location and choose the destination folder in Google Drive.
If prompted, click Accept to enable cookies.
- The File Upload question is now connected to Google Drive. Click Edit in the right panel any time you want to:
- change the destination folder,
- reconnect a different Google account,
- revoke integration permissions.
To remove the integration, click Edit and choose Revoke in the permissions section. Revoking permissions disconnects all Google Drive-connected questions in this form.