When you promote a survey or form with Meta ads, Meta Pixel helps you measure visits to your respondent-facing page and improve campaign optimization and retargeting. Responsly connects using your Pixel ID from Meta Events Manager—you paste the ID in the builder; you do not need to embed the full pixel JavaScript yourself.
This guide covers what you need in Meta, where to enable the integration in Responsly, what event fires today, how to verify in Events Manager, and what to try if events look missing.
Before you start
You need:
- A Meta Business setup with a pixel created in Events Manager (Meta’s pixel setup help).
- Your Pixel ID (the numeric identifier Meta shows for that pixel).
- Editor access to the Responsly form you want to track.
- The public URL people use to open the form (use this URL when testing).
Connect Meta Pixel in Responsly
Follow these steps in the form editor:
- Open the form you want to track.
- Go to Integrations in the builder navigation.
- Open the Tracking & pixels section (or find Meta Pixel in the integrations list).
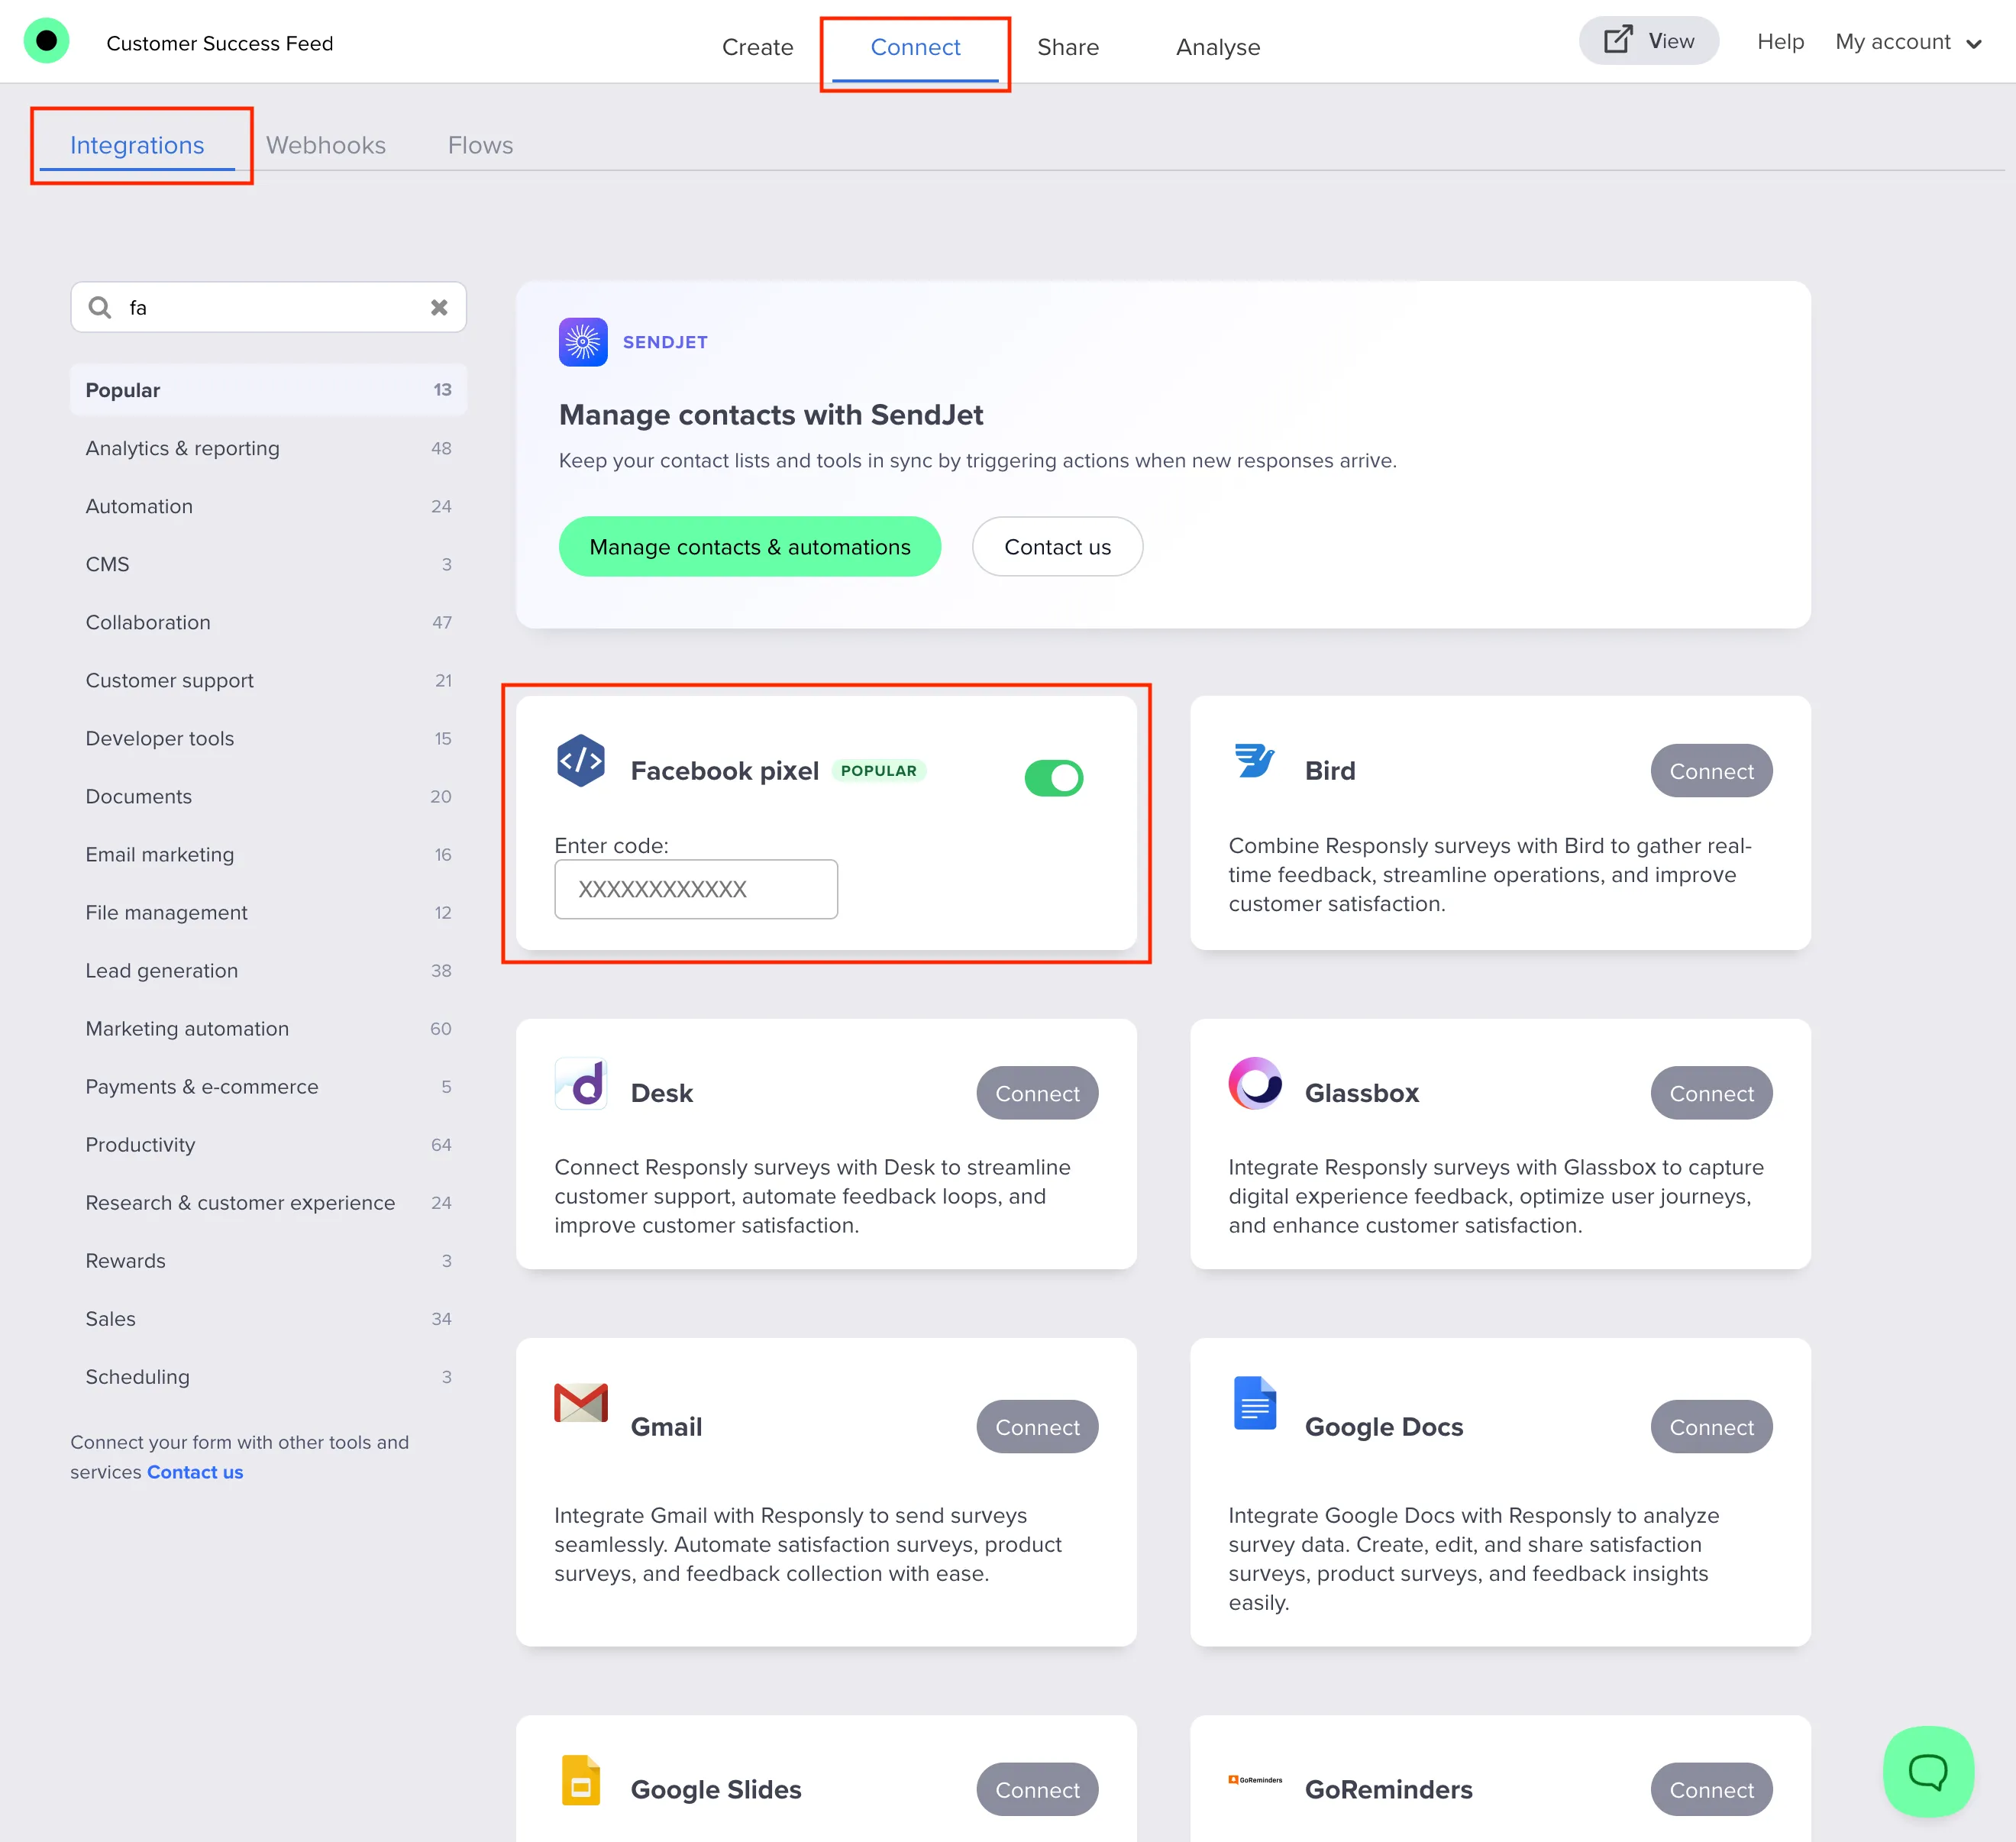
- Turn on Meta Pixel using the toggle.
- When the code field appears, choose Enter code and paste your Pixel ID exactly as shown in Events Manager (digits only, no spaces—same shape as the placeholder suggests).
- Wait for settings to save.
If the field rejects empty input, ensure you pasted the full ID and removed accidental spaces.
What gets tracked
With this integration enabled on your form:
- The public form page loads Meta’s pixel script (
fbevents.js). - The pixel is initialized with your Pixel ID.
- A
PageViewevent is sent when the page loads.
Responsly does not automatically send separate Meta standard events for each question step or for form submission through this field. If you need Lead, Submit, or custom events, plan those in Google Tag Manager (see Google Tag Manager integration) or another approach your organization uses.
Verify that tracking works
- Open Meta Events Manager for the same pixel as your Pixel ID.
- Use Test events (or Diagnostics) as documented by Meta for your account.
- In another browser window or incognito session, open your live form URL and load the page.
- Within a short time you should see activity for PageView (or equivalent browser events for your pixel).
If nothing appears:
- Confirm you used the published link, not only an internal preview.
- Disable ad blockers and strict tracking protection during the test.
- Double-check that the Pixel ID matches the pixel you are viewing in Events Manager.
- Ask whether a consent banner or cookie policy must be accepted before marketing pixels load on your domain—embedded forms follow the same browser rules as the page they sit on.
Troubleshooting
| Issue | What to check |
|---|---|
| Pixel ID does not save | Field cannot be empty; remove typos and spaces. |
| No events in Test events | Wrong pixel selected in Meta, ad blocker, or testing preview instead of live URL. |
| Duplicate PageViews | Meta Pixel and another tag (e.g. GTM) both firing PageView—adjust your tag plan. |
| Need submission events | Built-in integration is PageView-only; use GTM or custom implementation for funnel/submit events. |
Meta Pixel vs Google Tag Manager in Responsly
- Meta Pixel: paste your Pixel ID for straightforward PageView tracking on the form page.
- Google Tag Manager: paste your
GTM-...container when you need GA4, multiple vendors, or custom events without changing Responsly code.
If you need flexible event-based measurement across platforms, GTM is usually the better option.
Related workflows
Pair measurement with a clear survey introduction, publish using How to create a survey, and compare traffic with exports from How do I export survey data?.