Responsly allows you to enrich your Salesforce CRM with actionable survey insights by seamlessly syncing survey responses to your Salesforce objects. With this integration, you can:
- Map survey responses to any field in Salesforce Standard Objects (Lead, Contact, Account, Opportunity, Case, etc.) and Custom Objects
- Trigger surveys automatically based on Salesforce events (e.g., Case Closed, Opportunity Won)
- Generate new leads or contacts directly from Responsly surveys on your website
- View customer sentiment data within Salesforce dashboards
- Set up automated workflows triggered by survey responses for personalized follow-ups
Note: The Salesforce integration works with Salesforce CRM (Sales Cloud). Salesforce Marketing Cloud uses a different data structure and is not compatible.
Prerequisites
Before setting up the integration, ensure you have:
- A Responsly account
- A Salesforce CRM account (Sales Cloud — Enterprise Edition or higher recommended for API access)
- Administrator access in both platforms
Step 1: Create Your Survey
- Log in to your Responsly dashboard.
- Click Create new survey and choose a creation method — you can use a template, the AI survey generator, or build from scratch.
- Select your preferred survey type (NPS, CSAT, CES, or a custom questionnaire).
- Add your questions using any of the 20+ available question types.
- Configure Skip Logic if you want to show different questions based on responses.
- Optionally, add contact questions (for example: Email, Text for first/last name, Phone number, Company name) to collect respondent details — this is especially useful if you want to create new leads or contacts in Salesforce.
Tip: Place these contact questions before any questions you plan to map to Salesforce fields, so the respondent is identified before their answers are synced.
Step 2: Connect Responsly to Salesforce
Start by connecting your Salesforce account:
Responsly provides a native Salesforce integration that supports automated survey sending and response mapping to Salesforce objects.
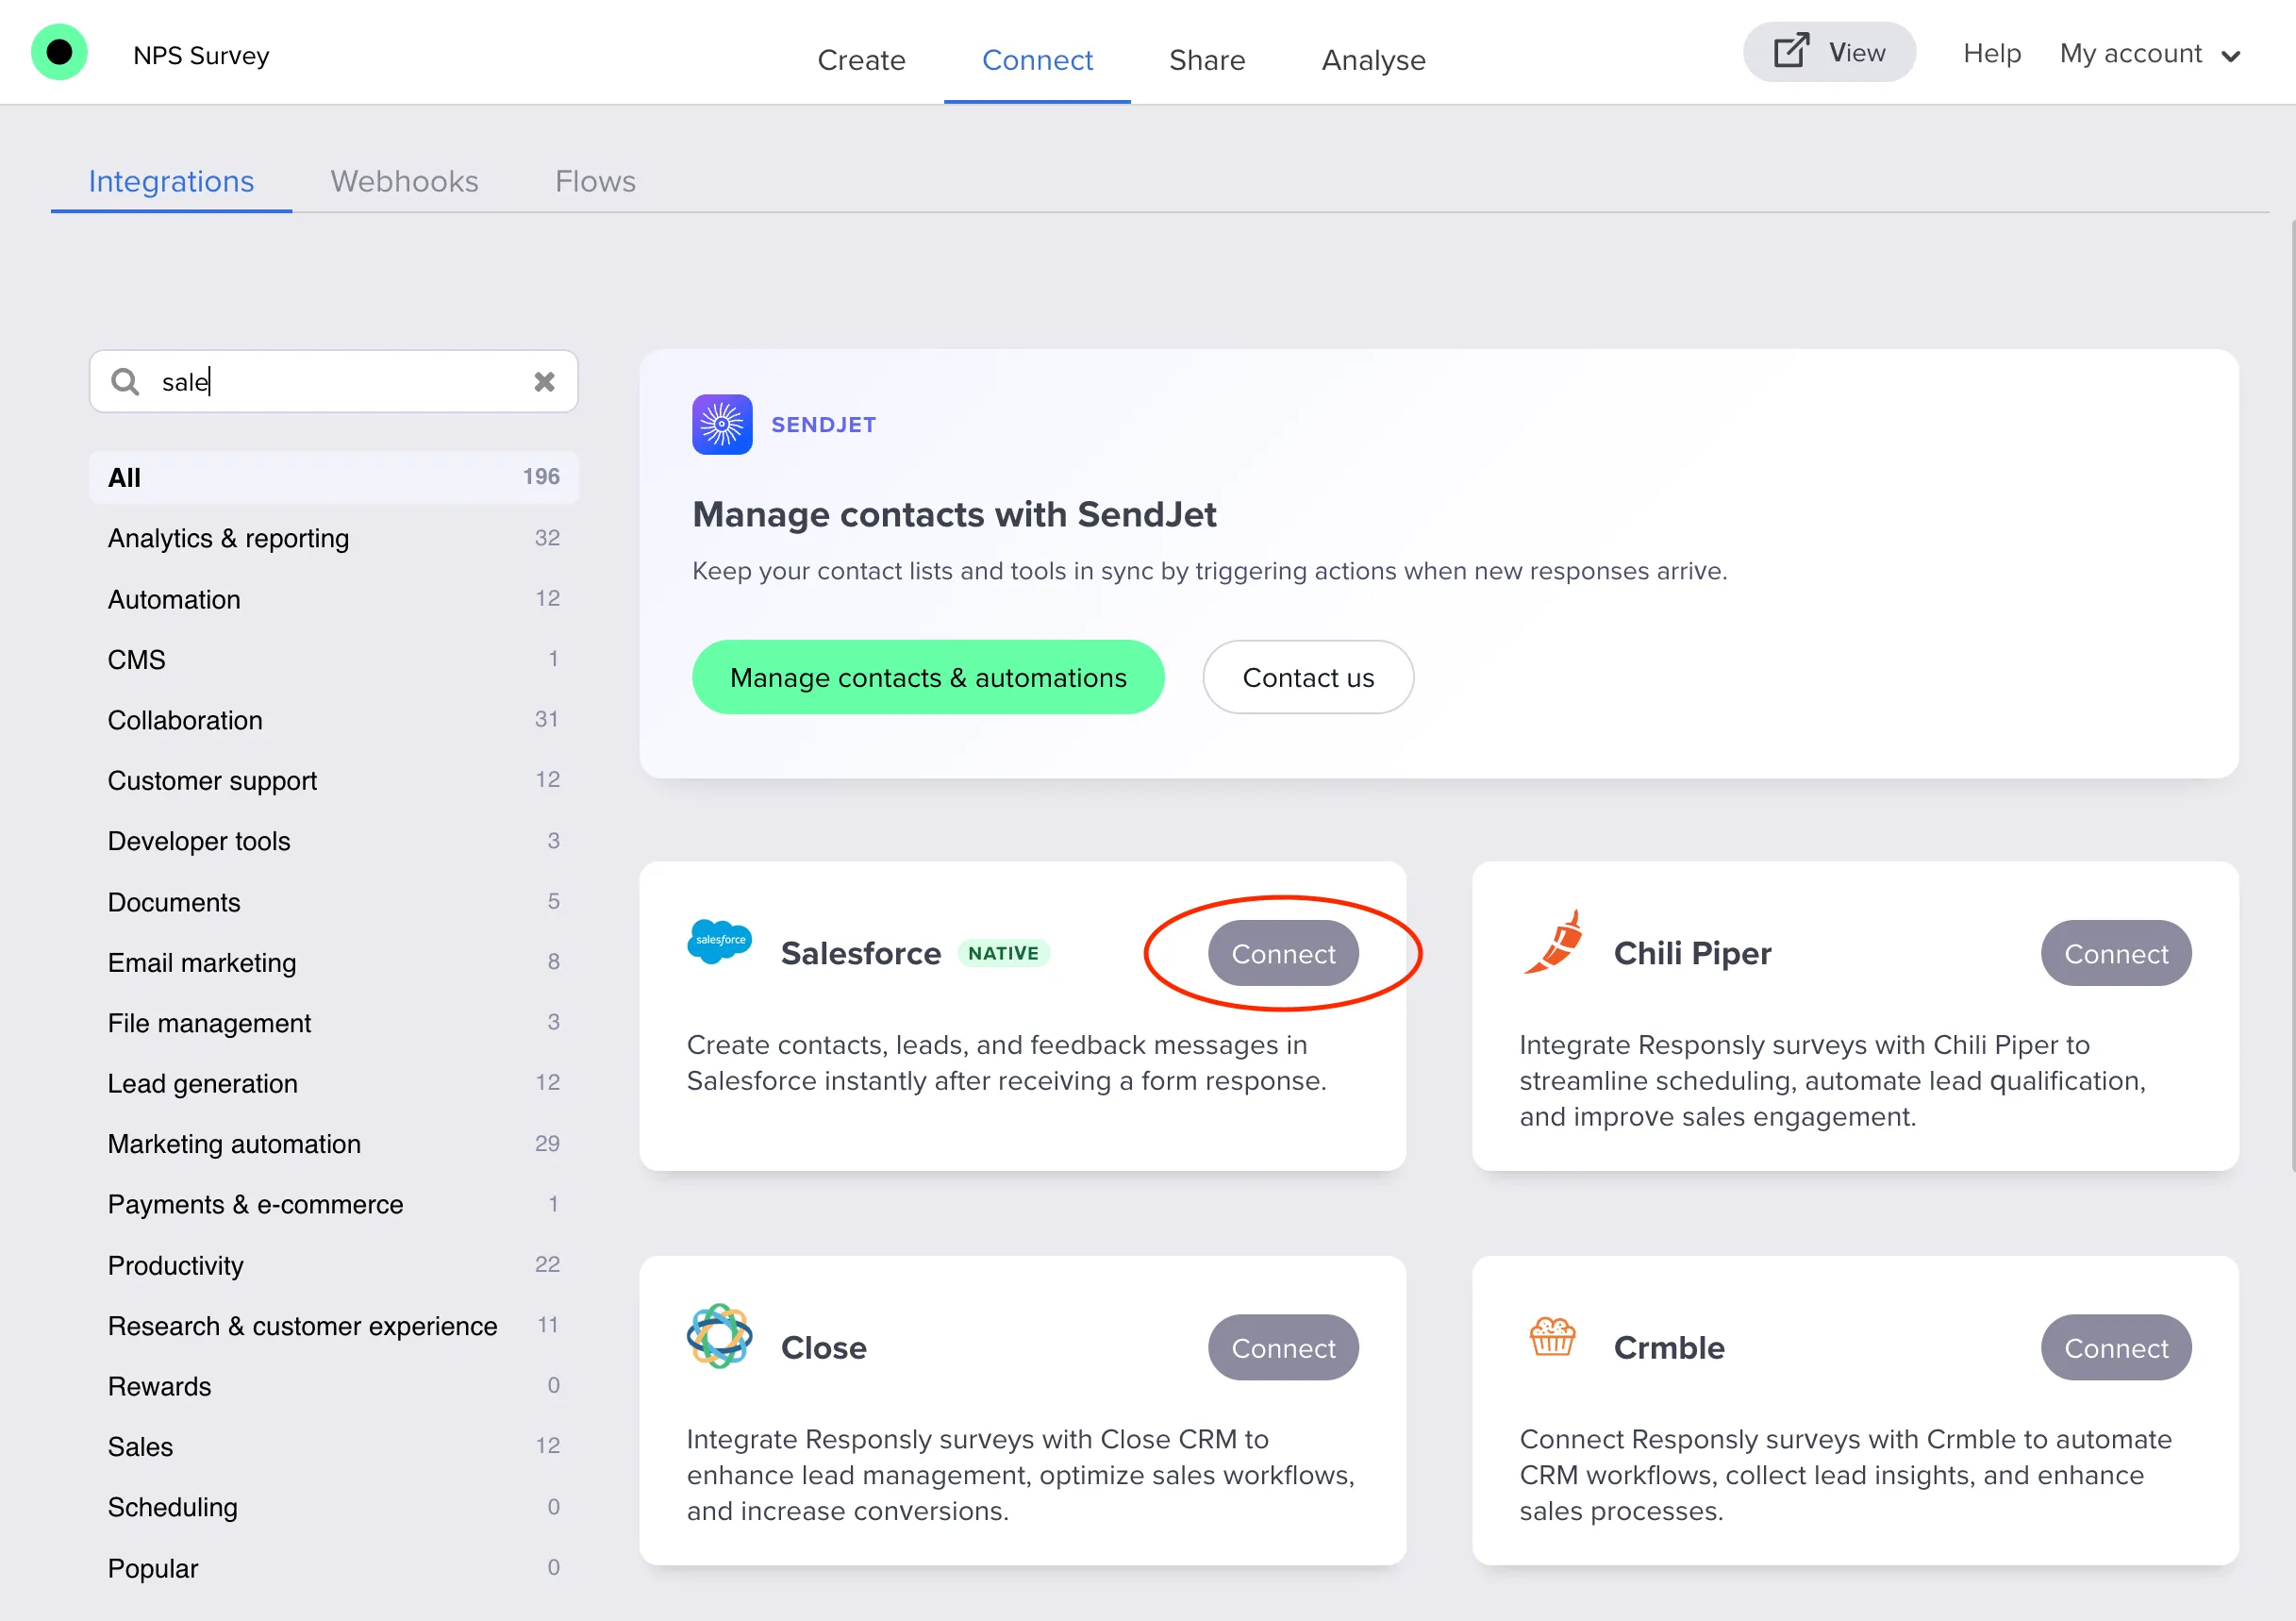
- Open your survey in Responsly.
- Navigate to the Connect tab.
- Find Salesforce in the list of available integrations.
- Click the Connect button to begin the authorization flow.
- A pop-up window will appear — log in to your Salesforce account and authorize Responsly.
If you don’t see the pop-up, allow pop-ups in your browser (check your URL bar for a blocked pop-up notification).
- Once authorized, the integration is active and ready to configure.
Sandbox vs. Production: You can connect to either your Salesforce Sandbox or Production environment. Use Sandbox for testing, then switch to Production before launching your survey to a live audience.
Step 3: Configuration
There are 4 configuration options:
- Survey Link
- Update Salesforce Records with Survey Response Data
- Set Static Values
- Configure Object Relationships
1. Survey Link
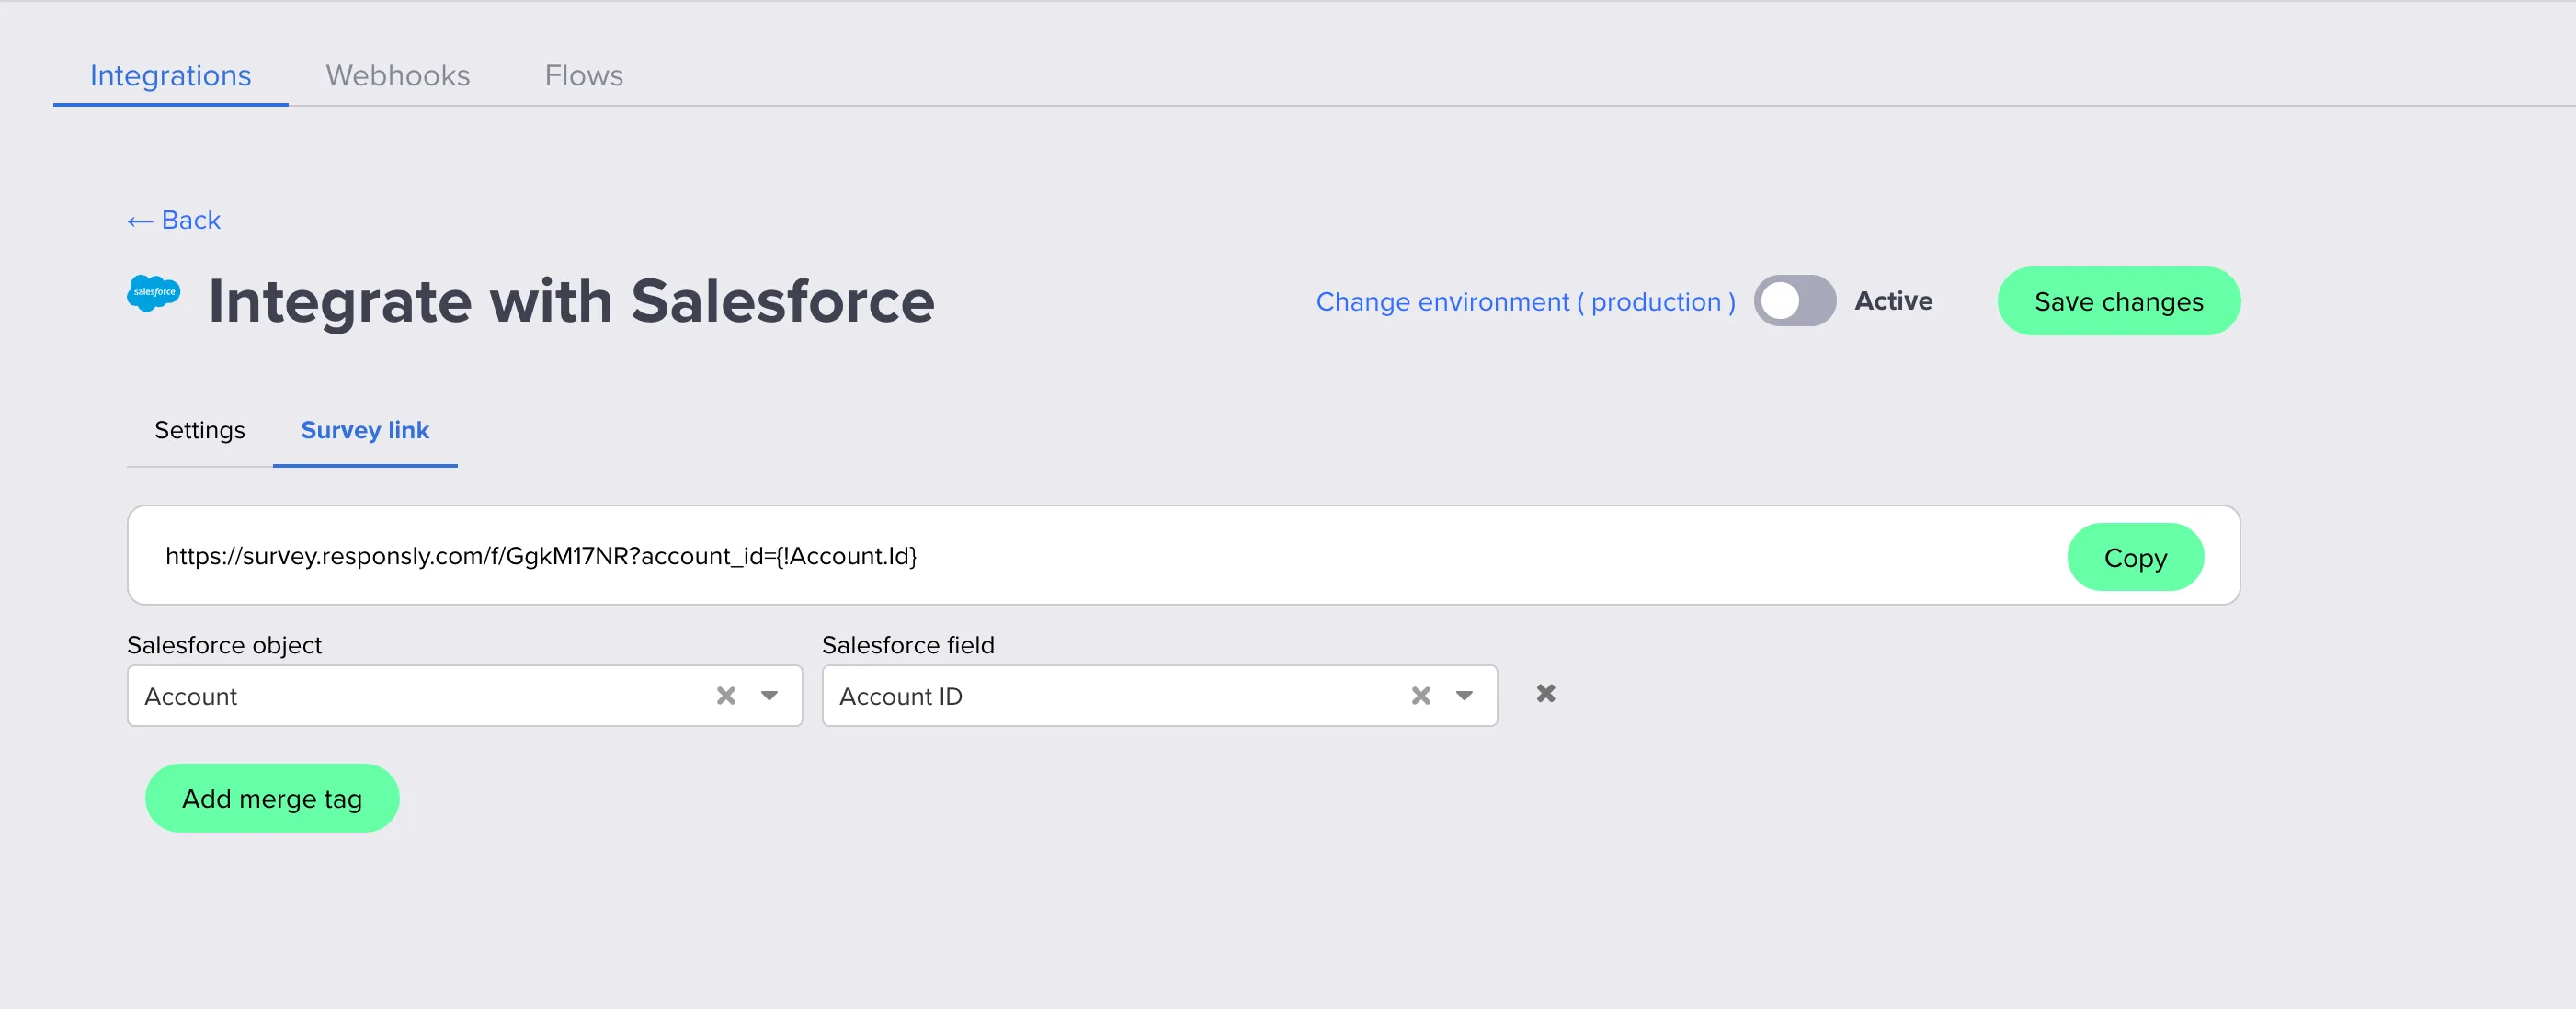
In Salesforce integration settings, click the Survey link tab:
- At the top you see the public survey URL with all currently configured Salesforce parameters already appended. Use the Copy button to copy this URL into your Salesforce templates or journeys.
- Below the link, for each row:
- Select a Salesforce object (e.g.
Account,Contact,Lead). - Select a Salesforce field (e.g.
Account ID,Contact ID,Email).
- Select a Salesforce object (e.g.
- Each row automatically:
- Adds a hidden variable to the form with the name based on the selected object and field (e.g.
account_id,contact_email). - Updates the survey URL to include the corresponding query parameter and merge tag value.
- Adds a hidden variable to the form with the name based on the selected object and field (e.g.
- Click Add merge tag to add more object/field combinations and extend the URL with additional Salesforce-mapped parameters.
In the Survey link tab of the Salesforce integration you will see a ready-made URL, including the correct parameter names for the generated hidden variables. When distributing the survey, keep that structure and only replace or configure the merge tags on the Salesforce side.
Example structure (parameters are generated by Responsly):
https://yourcompany.responsly.com/s/abcd1234?contact_email={!Contact.Email}&contact_id={!Contact.Id}- The first parameter starts with
? - Additional parameters are separated with
&
When sending from Salesforce, use merge tags to dynamically populate these values. Responsly generates merge tags in the classic format ({!Object.Field}); if you use Lightning templates you can adapt them to Lightning syntax if needed (see the merge tag table later in this guide).
Important: The integration will not work for anonymous responses. Make sure respondents are always identified via hidden variables (from the Salesforce configuration) or a Contact Form question.
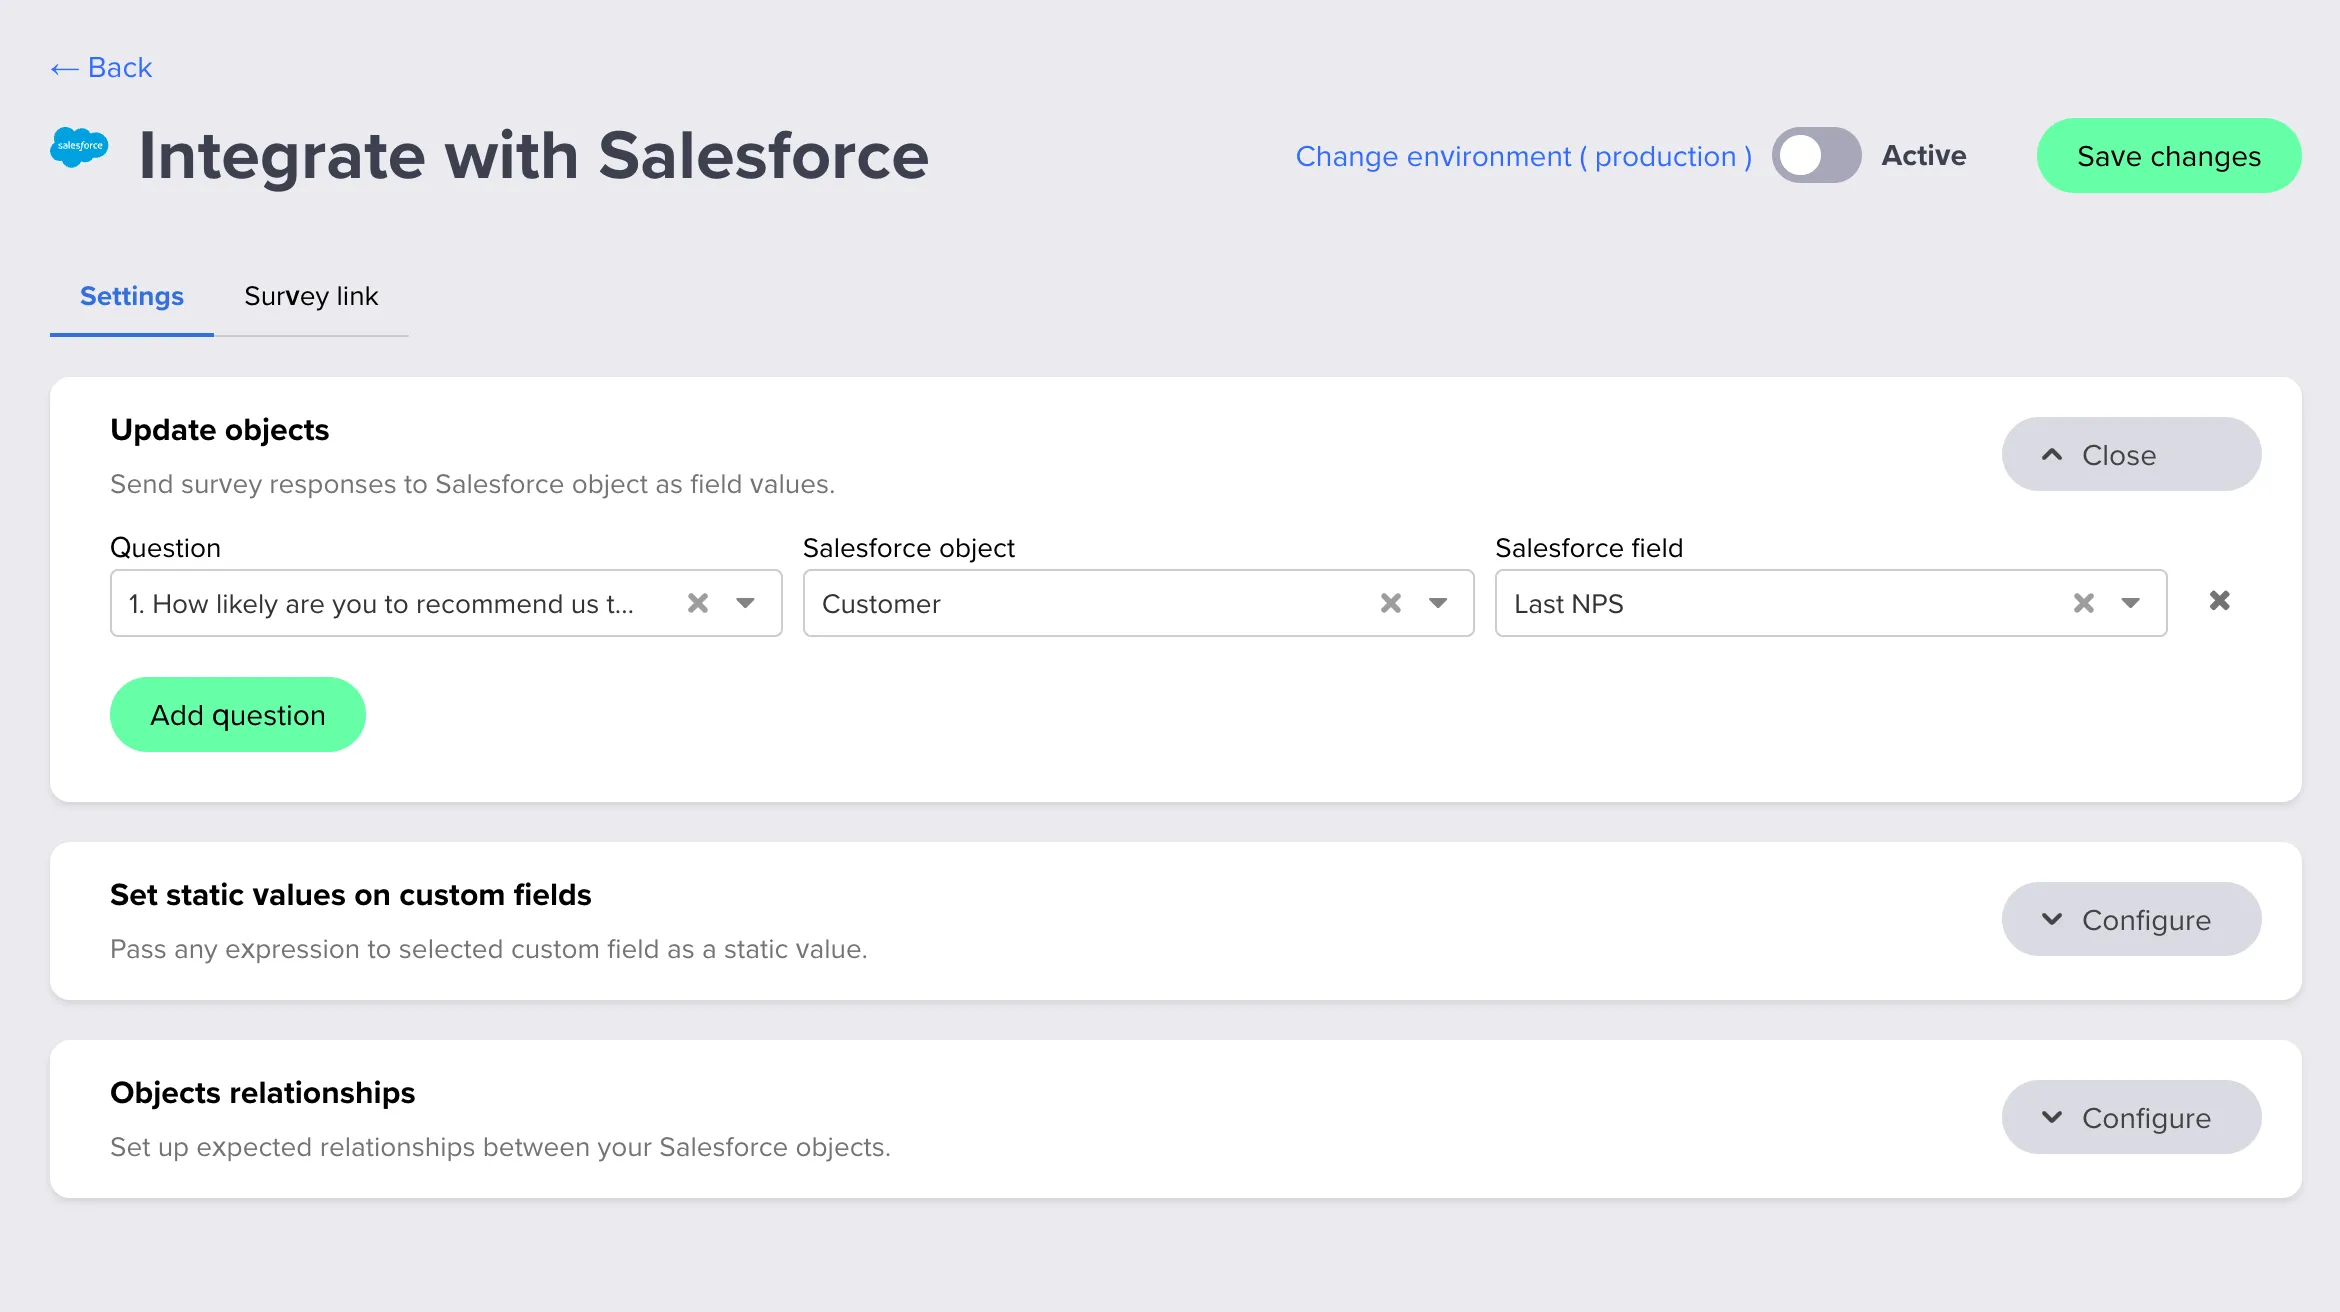
2. Update Salesforce Records with Survey Response Data
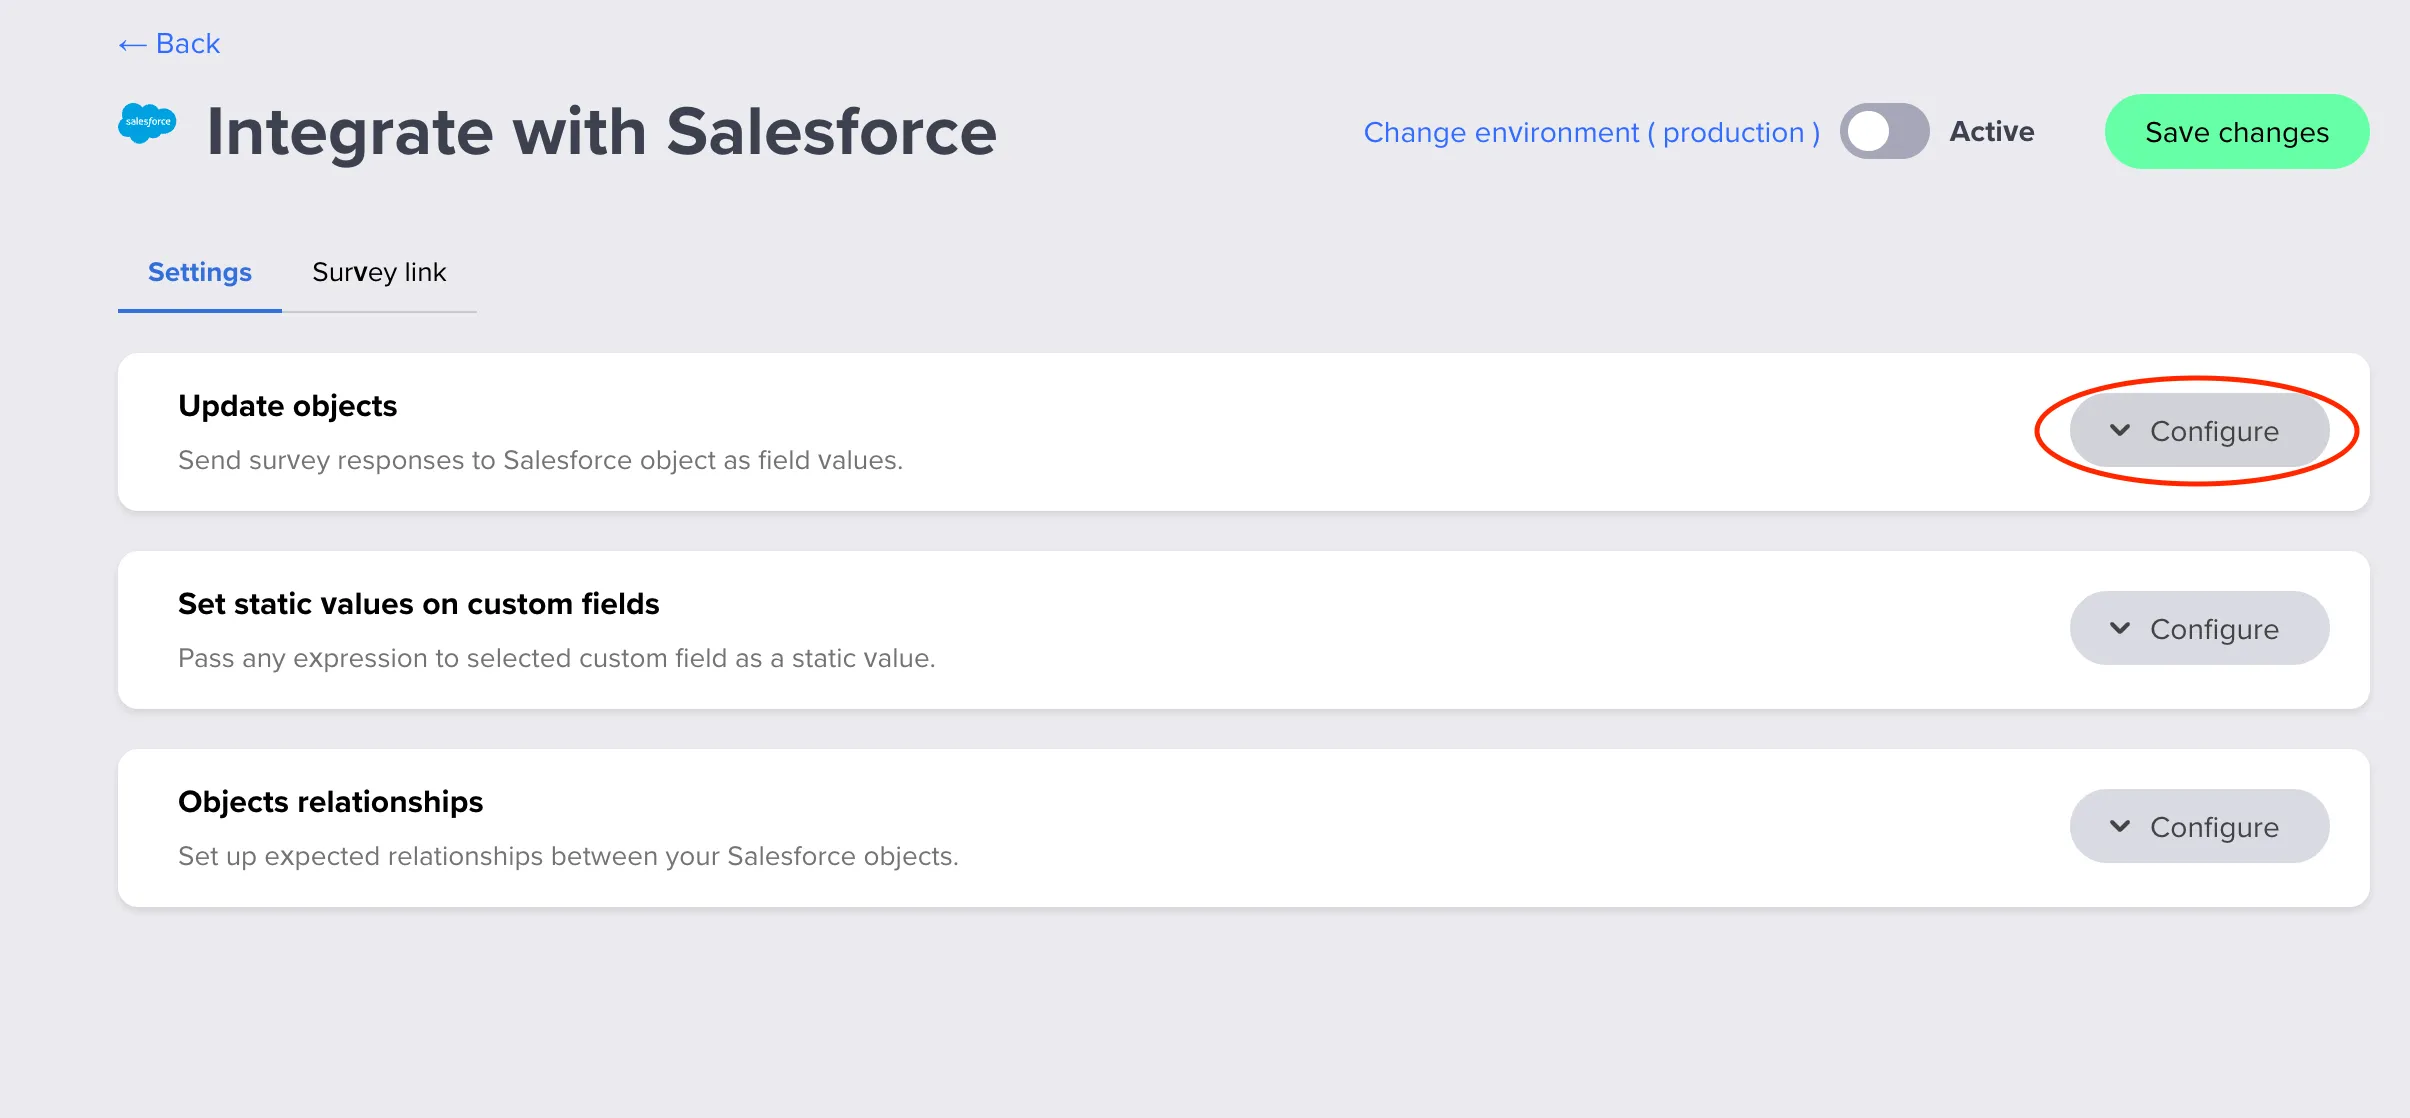
- Select the Update objects tab.
- For each question you want to sync:
- Choose the question from your survey.
- Select the Salesforce Object (Contact, Lead, Account, Opportunity, Case, or Custom Object).
- Select the Field you want to populate with the response.
- Click Connect another question to map additional questions.
3. Set Static Values
You can send static values to Salesforce for every respondent who completes a specific survey:
- In the Salesforce integration settings, select the Set static values on custom fields tab.
- Choose the Salesforce Object and Field.
- Enter the static value (e.g., the survey name, a campaign code, or a source tag).
- Click Add another field to set multiple static values.
Note: The static value must match the target field type in Salesforce. For dropdown fields, enter an exact value from the dropdown list. For reference fields, enter the correct Salesforce record ID.
4. Configure Object Relationships
To associate related Salesforce objects (e.g., link a Contact to an Account):
- In the integration settings, select Objects relationships.
- Select Object #1 (e.g., Contact).
- Select Object #2 (e.g., Account) and the Relationship field.
- Click Set up another relationship to add more associations.
Step 4: Testing
Before going live, always test the integration:
- Create a test Contact (or Lead) in Salesforce with a valid email address you control.
- Send a test survey email using the template you configured.
- Complete the survey from the test email.
- Return to Salesforce and open the test Contact/Lead profile.
- Check the Details tab — the mapped fields should now show the survey response data.
- If responses don’t appear:
- Verify that hidden variables are correctly appended to the survey URL.
- Ensure field types in Salesforce match the data being sent.
- Reauthorize the integration if you recently added new custom fields in Salesforce.
Creating New Leads/Contacts in Salesforce from Contact Form
Responsly can automatically create new records in Salesforce when respondents fill out a Contact Form.
- Add a Contact Form question to your survey with the required fields (name, email, phone, company, etc.).
- In the Salesforce integration settings, under Update objects, select your Contact Form question.
- Choose the Salesforce object to create: Lead, Contact, or Account.
- Click Edit mapping to assign each form field to the corresponding Salesforce attribute.
When a new respondent completes the Contact Form, a new record will be automatically created in Salesforce.
Sharing Survey or Form via Salesforce
Distribute as a Direct Link
- In the Share tab of your survey, copy the survey link.
- Append hidden variables with Salesforce merge tags (Survey Link).
- Embed the link as a CTA button or hyperlink in your Salesforce email template.
Embed in Salesforce Email Templates
To display the first survey question directly in the email body:
- In the Share tab, click Get your code and copy the HTML embed code.
- In Salesforce, create or edit an email template:
Salesforce Classic:
- Navigate to Setup → Email Templates → New Template
- Choose Custom (without Classic Letterhead)
- Switch to HTML formatting
- Paste the Responsly HTML code into the body
- Save the template
Salesforce Lightning:
- Navigate to Setup → Classic Email Templates → New Template
- Choose Custom (without Classic Letterhead)
- Paste the Responsly embed code into the HTML body
- Save the template
- Use this template when sending emails from Salesforce to your contacts, leads, or within campaigns.
Merge Tag Reference
| Salesforce Edition | Contact Email | Contact ID | Lead Email | Lead ID |
|---|---|---|---|---|
| Classic | {!Contact.Email} | {!Contact.Id} | {!Lead.Email} | {!Lead.Id} |
| Lightning | {{{Contact.Email}}} | {{{Contact.Id}}} | {{{Lead.Email}}} | {{{Lead.Id}}} |
Important: Match the merge tag object type to the Salesforce object you’re targeting. If sending to Leads, use Lead merge tags. If sending to Contacts, use Contact merge tags. You cannot pass Contact email values to Lead fields or vice versa.
Analyze Survey Results
In Responsly
After collecting responses, navigate to the Analyze tab in your survey:
- Overall Results: View aggregated statistics, charts, and over-time trends.
- Individual Responses: Review each submission in detail.
- Data Export: Download raw data as XLSX or CSV, or save reports as PDF.
- Custom Reports: Create dedicated reports with tailored visualizations.
In Salesforce
Survey data synced to Salesforce appears in real time on each respondent’s profile:
- Open the Contact, Lead, or relevant object record.
- Check the Details tab for updated fields (e.g., NPS score, satisfaction rating, feedback text).
- Build Salesforce Reports and Dashboards to visualize sentiment trends across your customer base.
Automate Survey Follow-ups in Salesforce with Workflow Rules
Set up Salesforce Workflow Rules to trigger actions based on survey responses:
- Navigate to Setup → Process Automation → Workflow Rules.
- Click New Rule and select the relevant object (e.g., Contact).
- Set the evaluation criteria (e.g., “NPS Score equals Detractor”).
- Add a Workflow Action — for example:
- New Task: Assign a follow-up task to a team member.
- Email Alert: Send an automated email to the account manager.
- Field Update: Change the lead status or priority level.
- Activate the rule.
Send Salesforce Post-Close Surveys Automatically
Trigger a CSAT or CES survey automatically when a case or deal is closed:
- Create a Salesforce email template with the Responsly survey embedded (see Embed in Salesforce Email Templates above).
- In Setup → Process Automation → Workflow Rules, create a new rule.
- Select the object type (e.g., Case or Opportunity).
- Set the criteria: Status equals Closed (or your equivalent).
- Add an Email Alert workflow action using your survey template.
- Activate the rule.
Supported Salesforce Field Types
Responsly enforces basic type compatibility between your survey questions and Salesforce fields. The table below summarizes how common Salesforce field types map to Responsly questions and how values are sent:
| Salesforce field type | Example Responsly question types | How the value is sent / notes |
|---|---|---|
| Text / Textarea / String / Email / URL / Phone | Text, Email, Number, Rating, CSAT, NPS, Yes/No, Multiple choice, Picture choice, Dropdown, Matrix, Sliders, Constant sum, Semantic differential, File upload, Signature | Most question types can be mapped to text‑based fields. Responsly converts the answer to a string; for multi‑select questions selected labels are joined with ;, matrix/complex answers are flattened into readable text. |
| Number / Integer / Double / Currency | Number, Rating, Opinion scale, CSAT, NPS, Number scale, Slider | Only numeric question types are offered for these fields. Responsly sends the numeric score (e.g. 0–10 for NPS, 1–5 for CSAT/rating). |
| Date / DateTime | Date | Responsly converts the answer to YYYY-MM-DD. For DateTime fields Salesforce will treat this as a date‑only value. |
| Boolean | Yes/No, Legal consent | true for a positive/accepted answer, false otherwise. |
| Picklist | Single‑select questions: Multiple choice (single), Picture choice (single), Dropdown (single), Yes/No | Responsly sends the selected label as text. The value must match one of the allowed picklist options in Salesforce. |
| Multi-picklist | Multi‑select questions: Multiple choice (multi), Picture choice (multi), Dropdown (multi) | Responsly sends all selected option labels joined with ;, which Salesforce interprets as a multi‑picklist value. |
| Reference | Hidden variables (e.g. contact_id, account_id) and advanced text mappings | Used primarily for IDs of related records. Hidden variables such as contact_id or account_id hold the Salesforce record IDs that are used when updating existing records or setting up object relationships. |
Tip: When creating custom fields in Salesforce for survey data, use the Text data type — it accepts data from any question type.
How Responsly formats field values for Salesforce
By default, Responsly sends the response content as the field value. The exact format depends on the question type and is handled automatically by the integration:
- Single‑value questions (e.g. text, number, email) are sent as a single value.
- Choice questions (single or multiple) are sent as the selected labels (multiple choices are joined with
;). - Date questions are converted to the
YYYY-MM-DDformat. - Matrix and other composite questions are flattened into readable text (rows, columns and values).
You do not need to configure additional per‑field mappings inside Responsly; make sure your target Salesforce field type can store the text/number you expect.